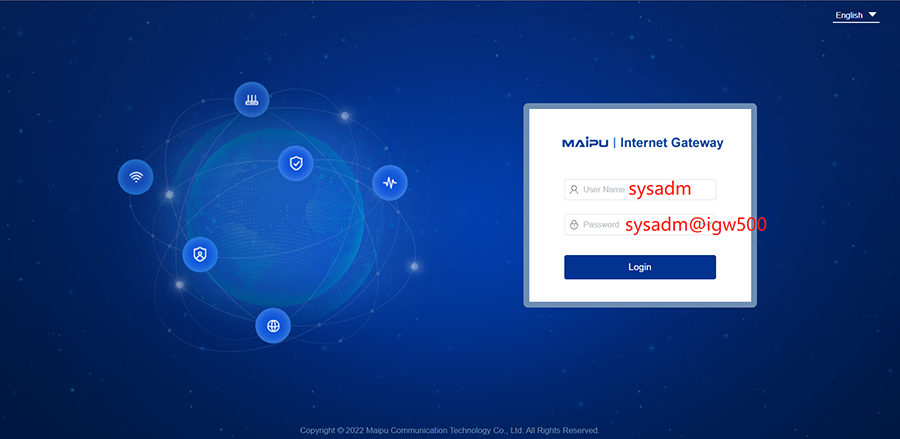
Connect the network cable of the PC to any LAN Interface of the device, configure IP address acquisition using DHCP, and open the browser. In the address bar, input https://192.168.100.254 and press Enter to enter the system login interface. Input the user name and password (default IGW500 user name: sysadm, password: sysadm@igw500) to enter the web management system, as shown below:

After logging in, enter the home page, click the “Configuration Wizard” button at the top right side of the page, as shown below:
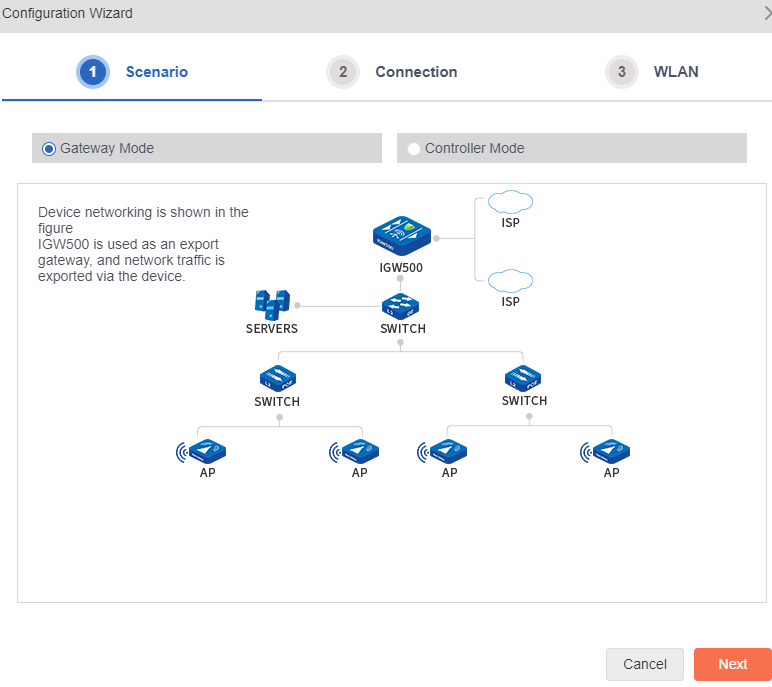
 Select the gateway mode, then click ‘Next’, as shown below:
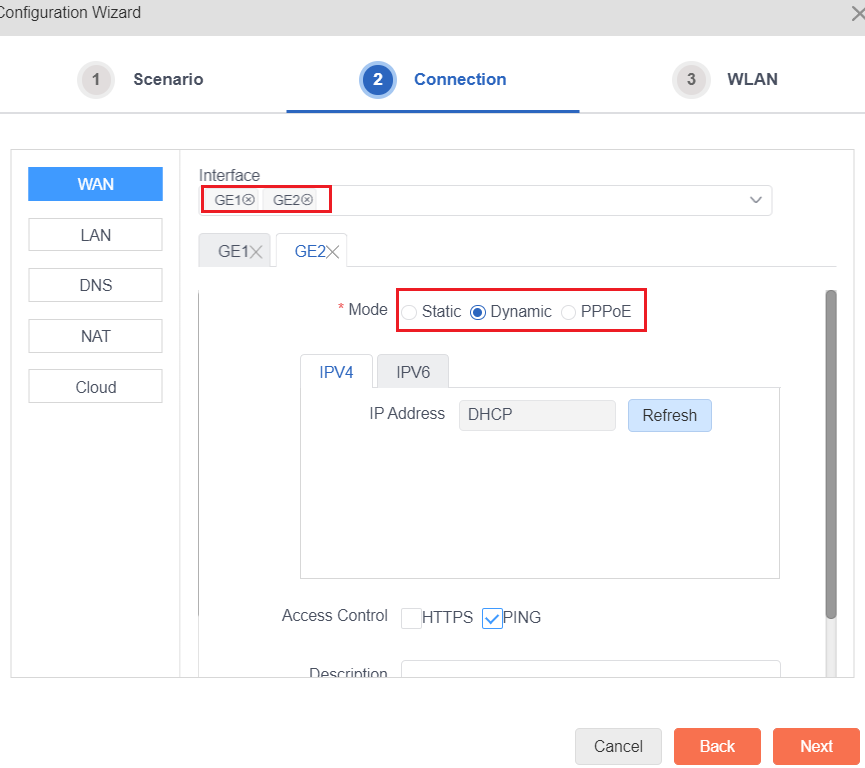
When selecting the gateway mode, first configure the interface. WAN is the uplink Internet interface (optical modem or egress router). Configure the IP address of the selected interface to ensure that the device can communicate with Internet, multiple WANs can be selected, and load balancing is enabled between WANs by the default, as shown below:
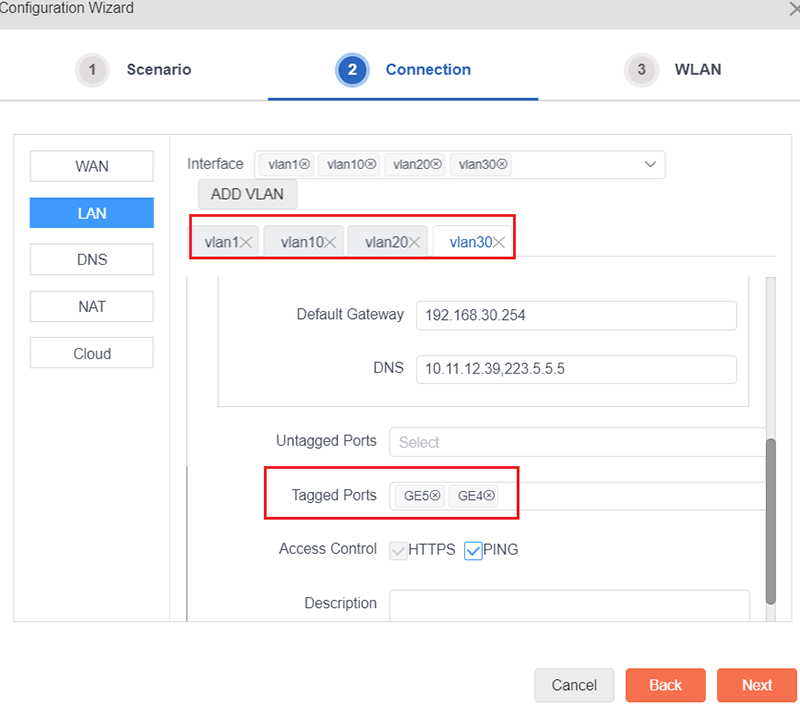
Click “LAN” to configure the LAN interface. Click Add VLAN to add multiple vlan. Meanwhile, tagged ports and untagged ports can be configured on this interface, as shown below:

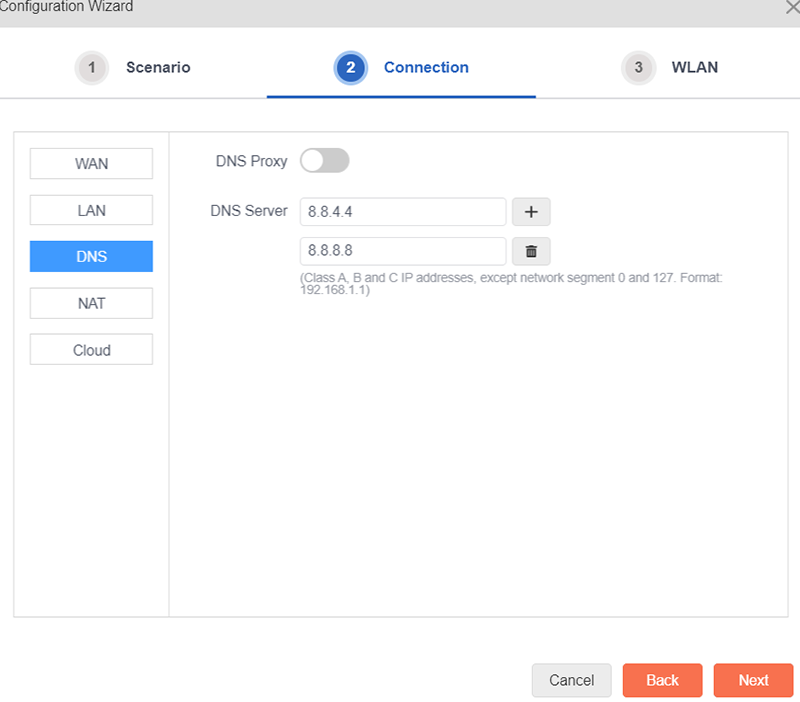
Click “DNS”, and configure the DNS server according to the actual networking, as shown below:
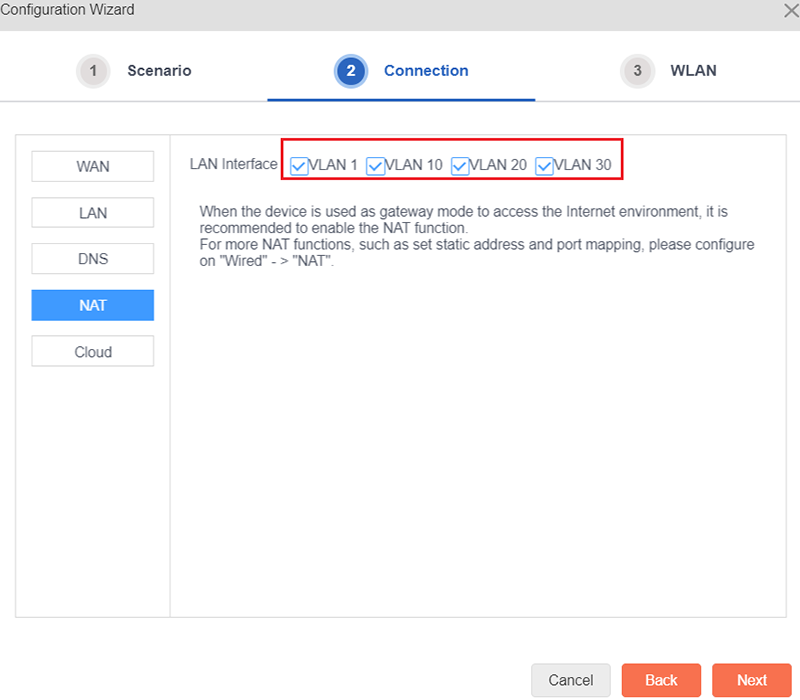
Click “NAT”, the gateway mode NAT is enabled by the default, which does not need to be modified, as shown below:
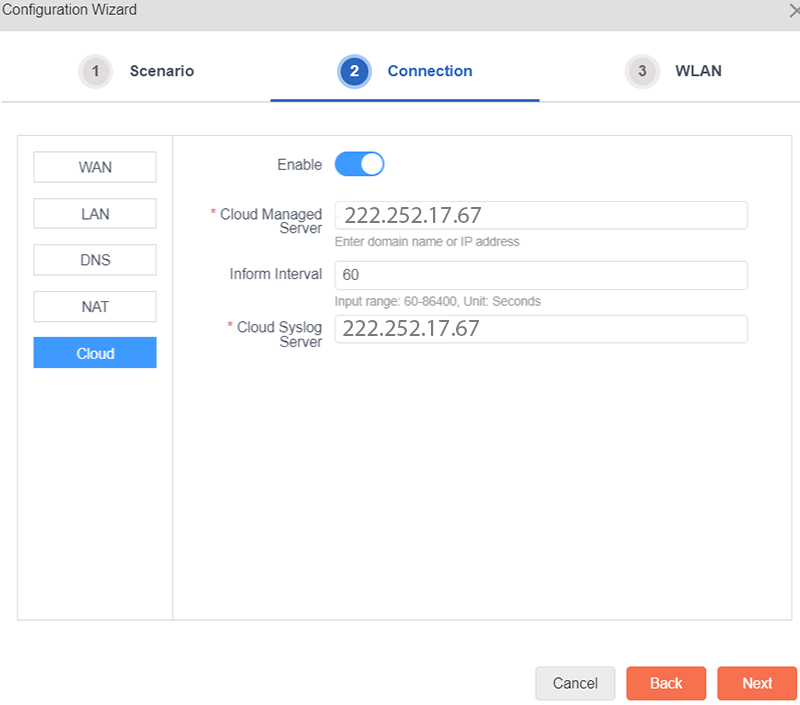
Click “Cloud”, and configure the cloud server parameters. Cloud server can be enabled or disabled. Fill Cloud Managed Server is 222.252.17.67. After configuring the cloud server, click “Next” to perform the wireless configuration, as shown below:
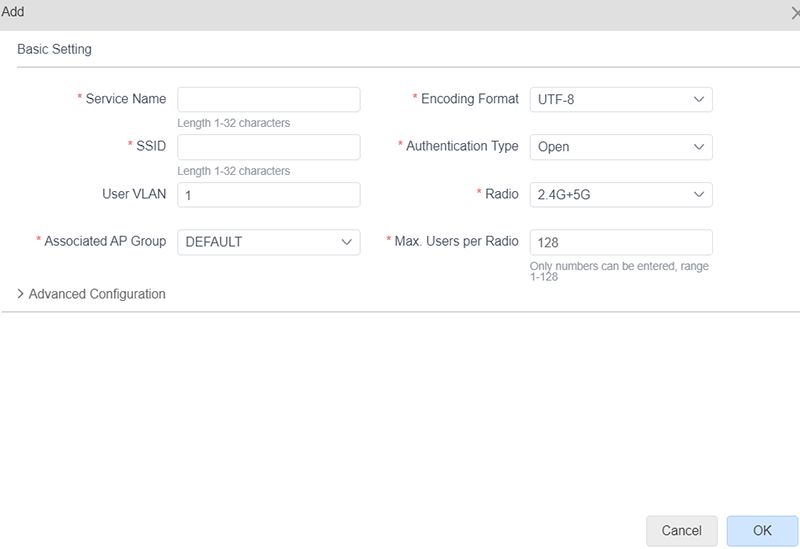
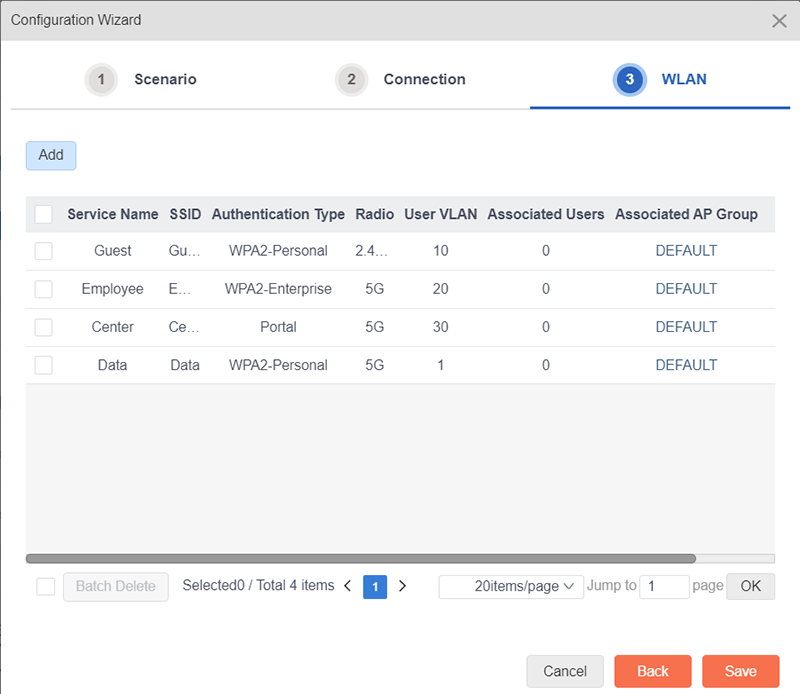
In the wireless configuration, configure multiple SSIDs and authentication type according to the wireless network planning, then click ‘Save’ to save and exit configuration wizard, as shown below:
 Switch