Service Configuration
From the upper menu bar [Inventory] -> [Service Deploy], you can enter the service configuration page. This page mainly provides the gateway device to add VLAN, set the IP address, DHCP service configuration, DNS and set the port information of the connected device. Service configuration currently only supports the networking of gateway + switch, and the scenario where switches are cascaded is not yet supported.
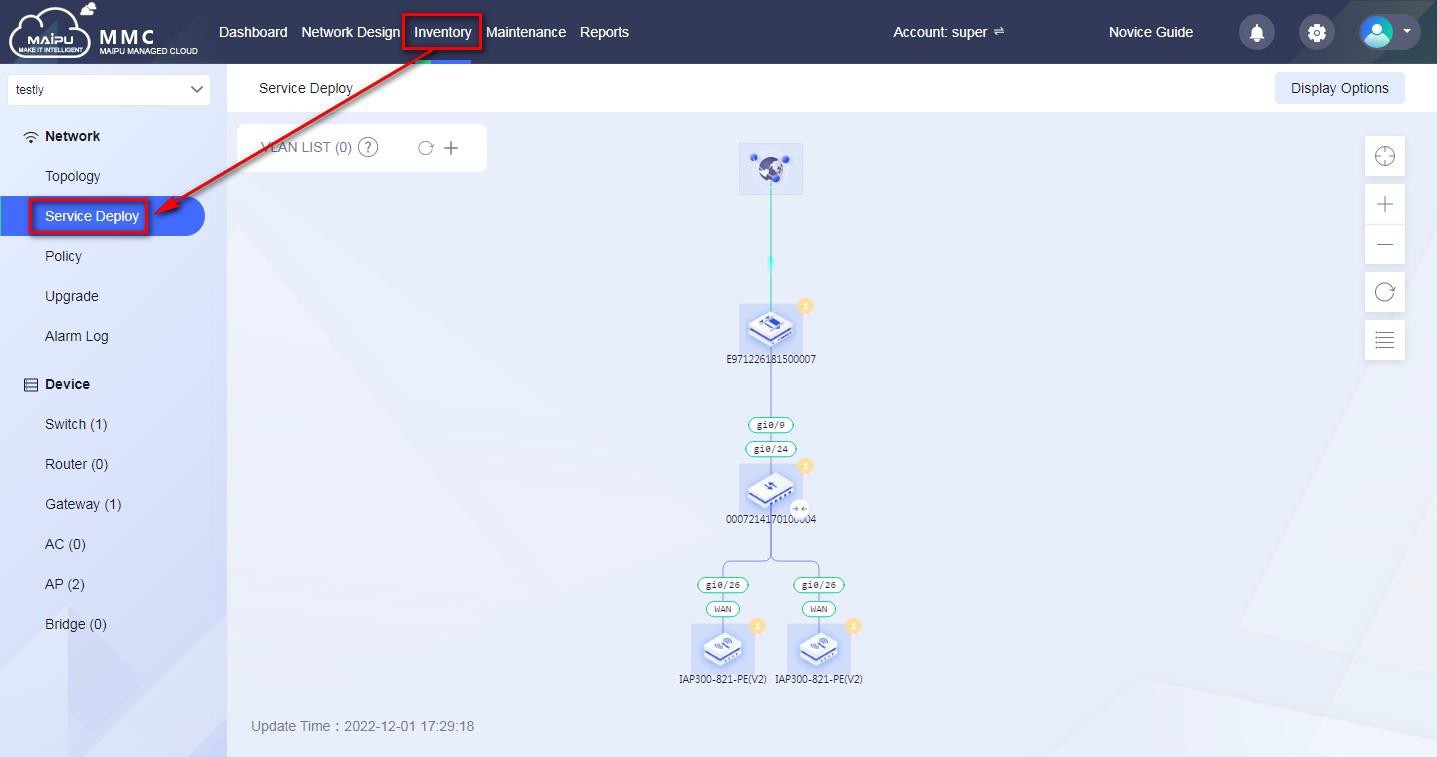
Figure 1-6-9 Service configuration
Add VLAN Configuration
Click  to add VLAN configuration. When adding VLAN , you can choose the gateway, fill in the IP address of the gateway, subnet mask, and configure the DHCP service as needed:
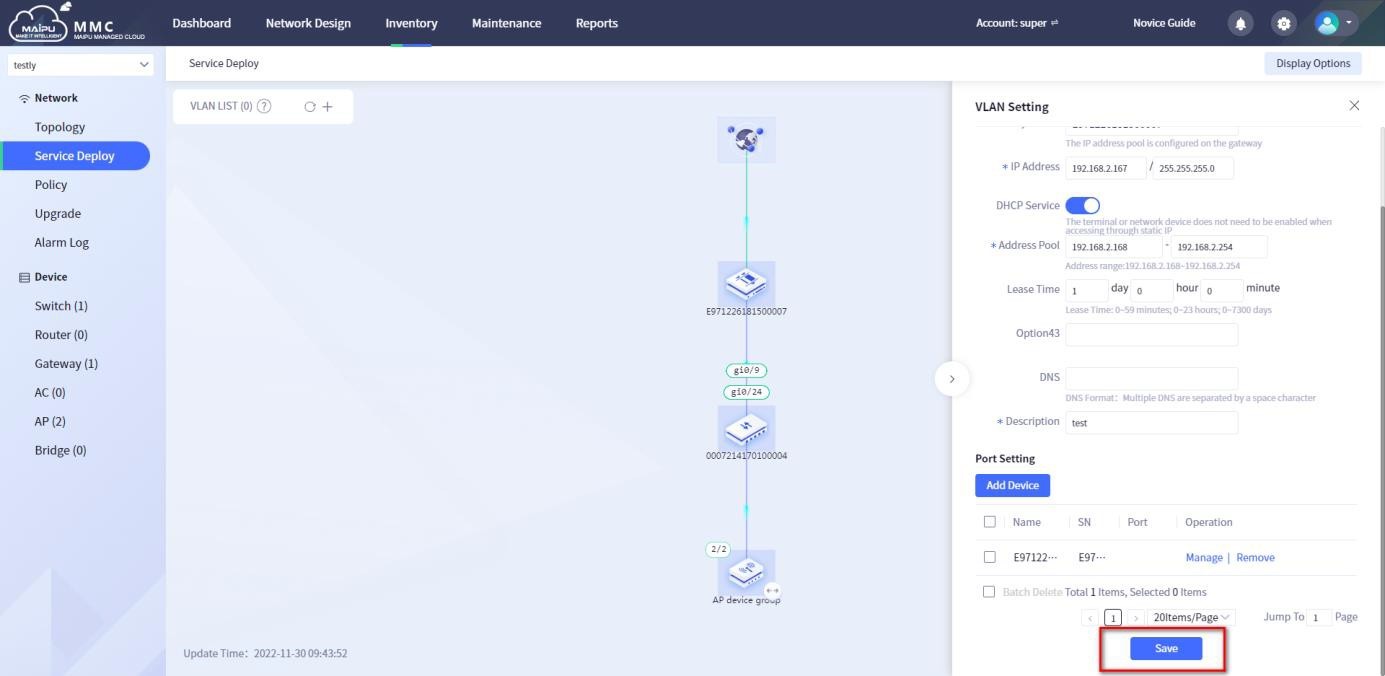
Figure 1-6-10 Add service configuration—VLAN configuration
Click the Add Device button under Port Settings to perform port settings for the specified device:
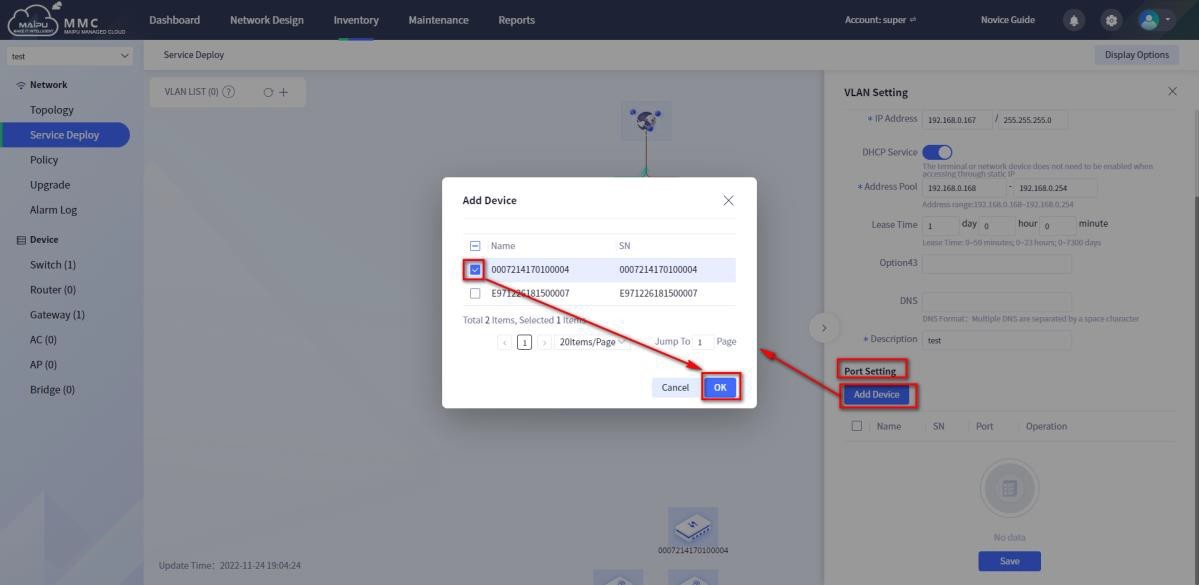
Figure 1-6-11 Add service configuration—port setting
After adding a device, click Manage to set properties for the selected port.
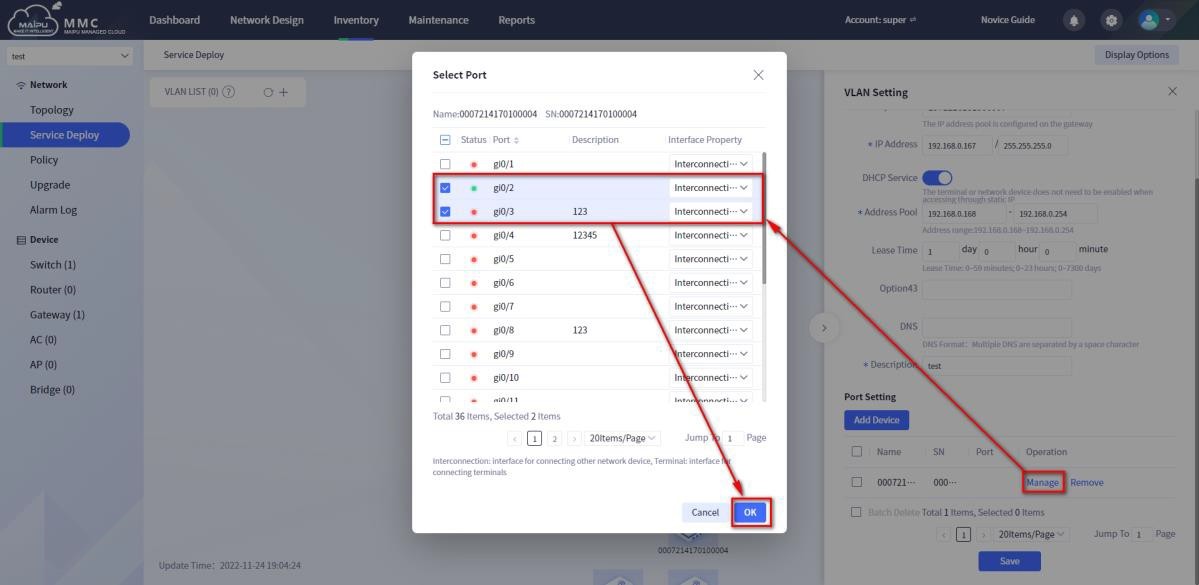
Figure 1-6-12 Add service configuration—port management
After setting the ports that need to be set on the device, click Save to save the business configuration:
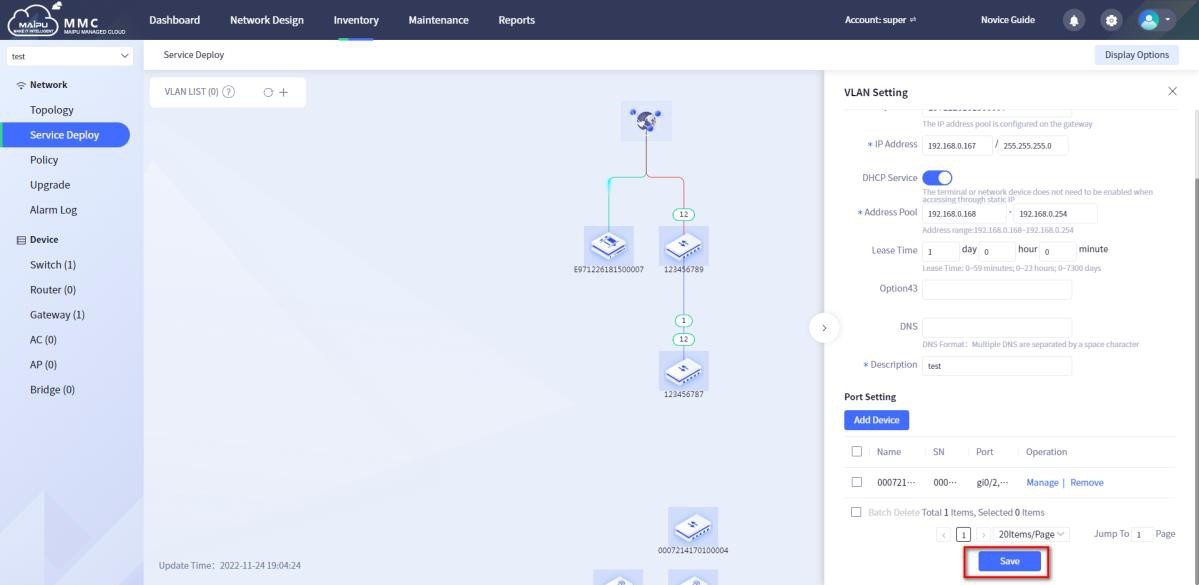
Figure 1-6-13 Add service configuration—save VLAN configuration
When adding the VLAN configuration and saving it, if there is no link between the devices, it will prompt that the link information does not exist:

Figure 1-6-14 Tips
Add a Virtual Link
If there is no real link information between devices, you can add a virtual link. Select the device, right-click, and select Add Link:
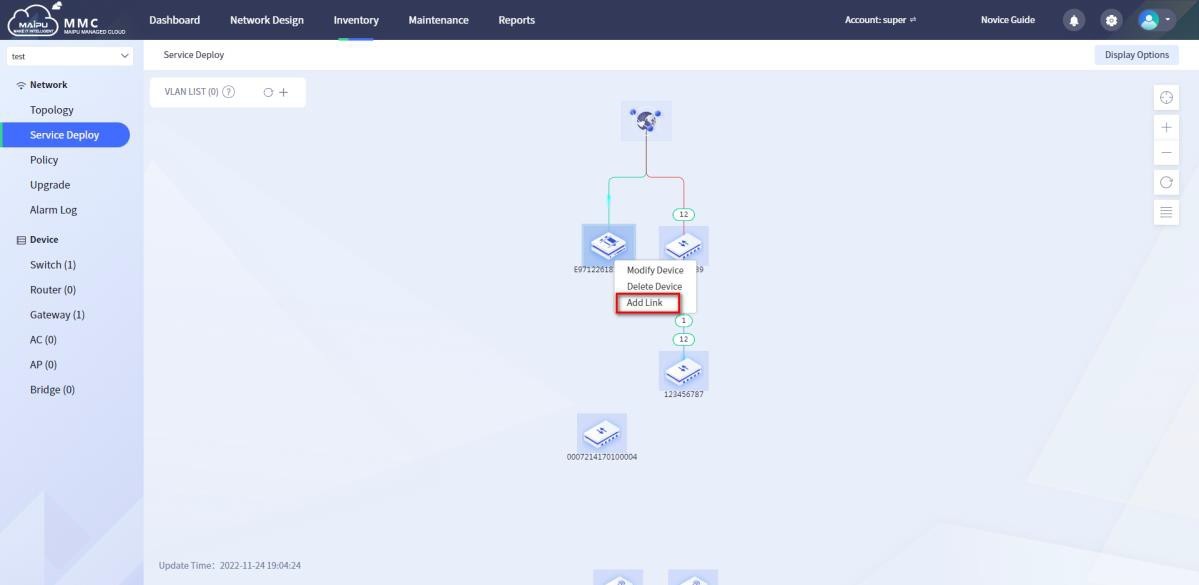
Figure 1-6-15 Add virtual link
Select source device and its port, target device and its port to add:
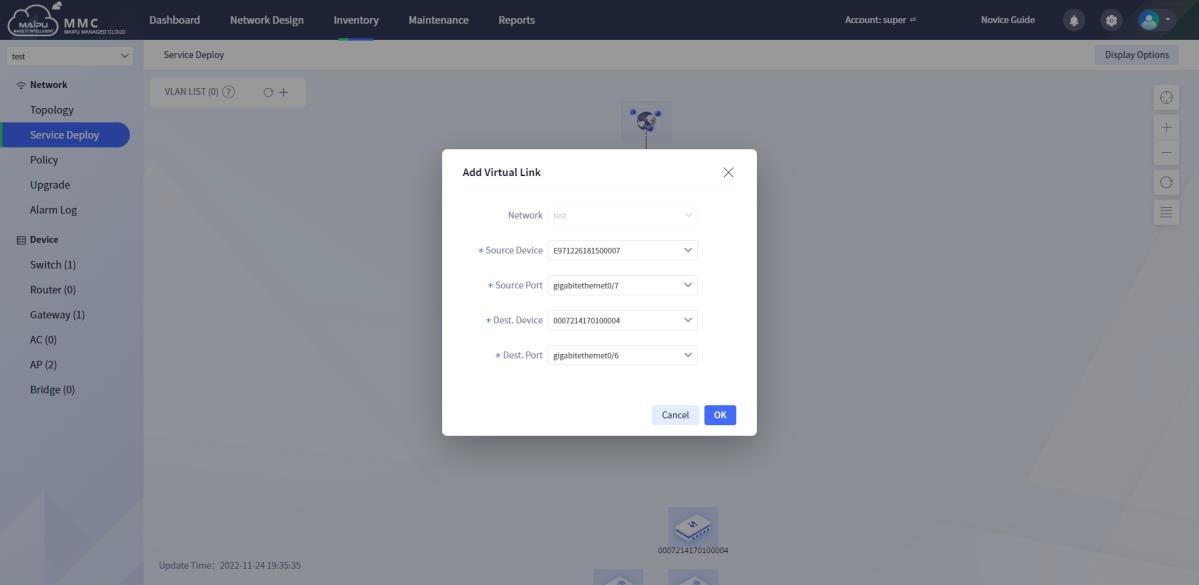
Figure 1-6-16 Add source and destination ports of the virtual link
After adding, the link information is as shown in the figure below:
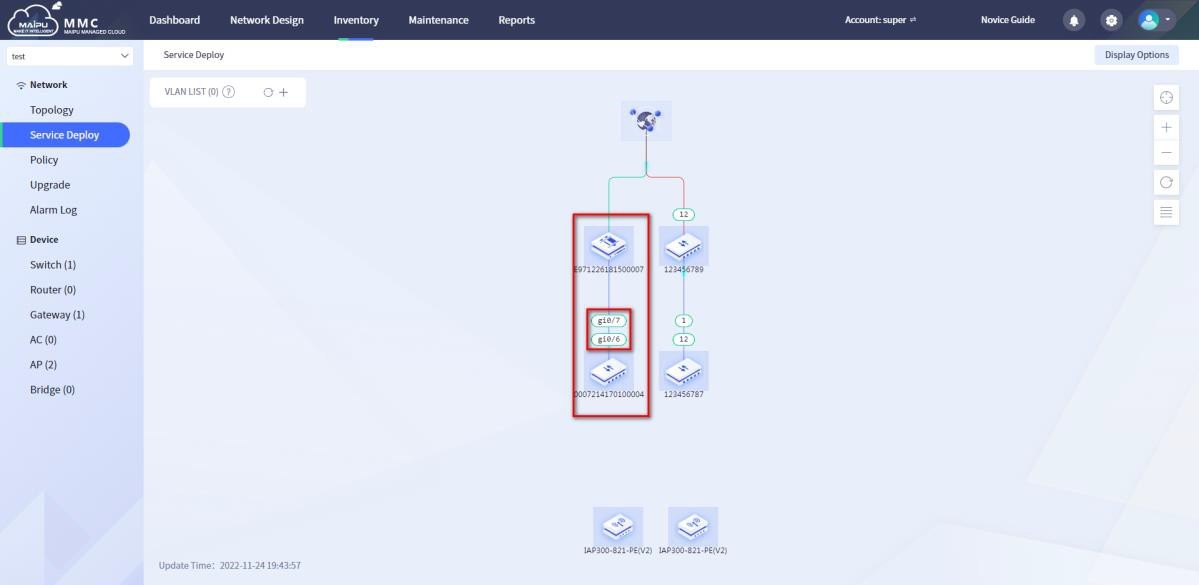
Figure 1-6-17 Virtual link
Modify VLAN configuration
Click the
Modify button to modify the service configuration, in which the VLAN ID and device cannot be modified, as shown in the figure:
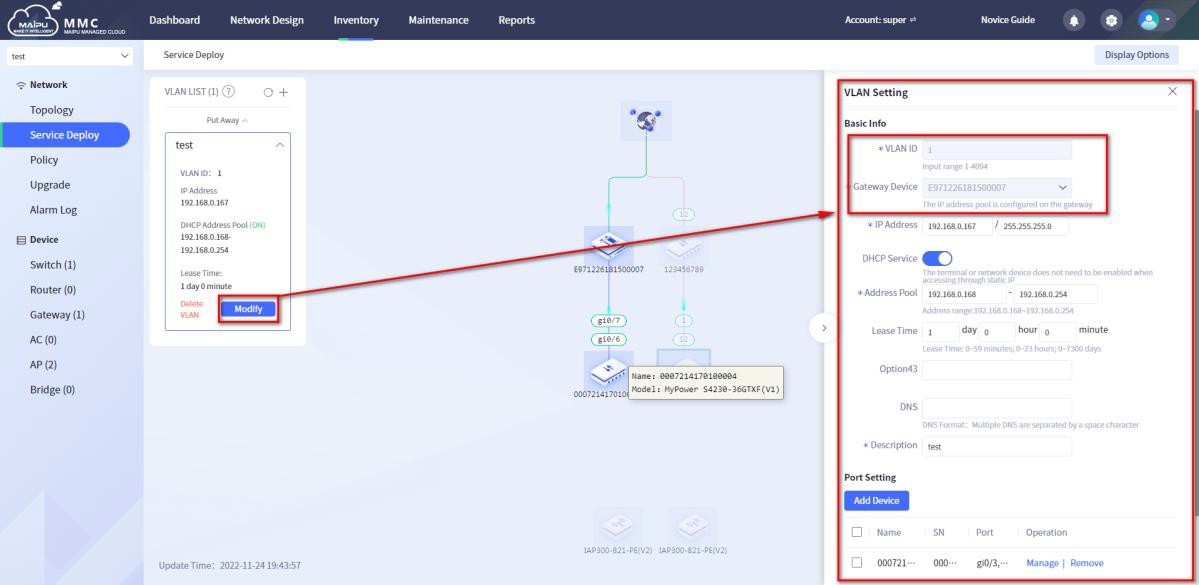
Figure 1-6-18 Modify VLAN configuration
Delete VLAN configuration
Click the Delete button to delete the VLAN configuration, as shown in the figure below:
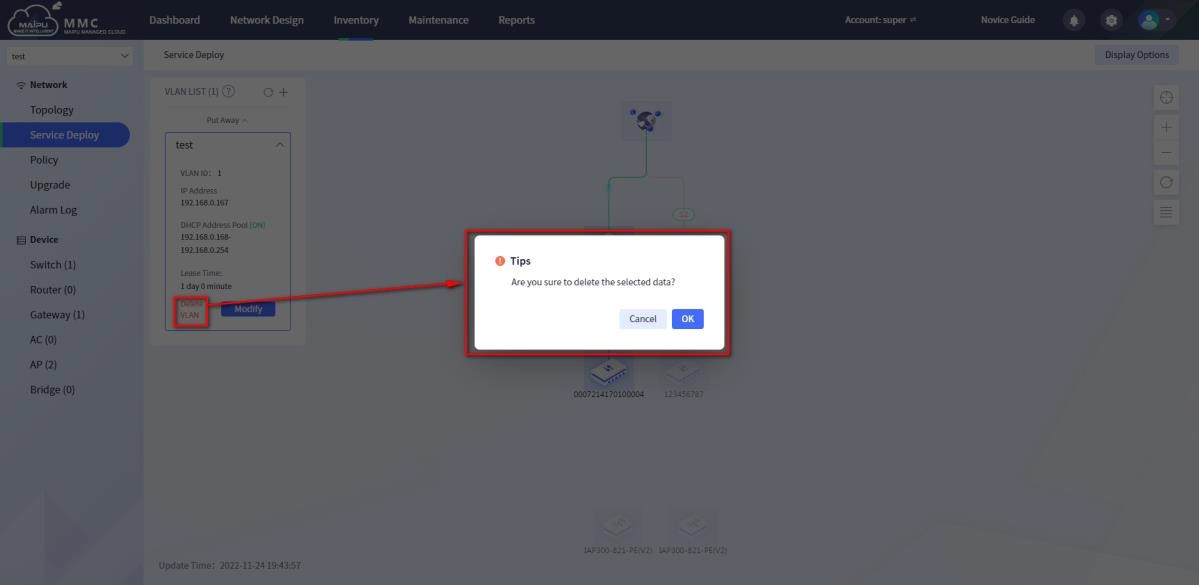
Figure 1-6-19 Delete VLAN configuration
 Switch
 Wifi - Access Point
 Firewall
 Router
 Module Quang
![Module Quang Cisco]() Module Quang Cisco
Module Quang Cisco![Module quang HPE]() Module quang HPE
Module quang HPE![Module quang Maipu]() Module quang Maipu
Module quang Maipu![Module quang Brocade]() Module quang Brocade
Module quang Brocade![Module quang Fortinet]() Module quang Fortinet
Module quang Fortinet![Module quang Aruba]() Module quang Aruba
Module quang Aruba![Module quang OEM]() Module quang OEM
Module quang OEM![Module quang Juniper]() Module quang Juniper
Module quang Juniper![Module quang Dell]() Module quang Dell
Module quang Dell![Module quang Palo Alto]() Module quang Palo Alto
Module quang Palo Alto![Module quang Huawei]() Module quang Huawei
Module quang Huawei![Module quang Arista]() Module quang Arista
Module quang Arista![Module quang F5]() Module quang F5
Module quang F5![Module quang H3C]() Module quang H3C
Module quang H3C![Module Quang Allied Telesis]() Module Quang Allied Telesis
Module Quang Allied Telesis![Module quang SonicWall]() Module quang SonicWall
Module quang SonicWall![Module quang Mikrotik]() Module quang Mikrotik
Module quang Mikrotik![Module quang Handar]() Module quang Handar
Module quang Handar Máy chủ (Server)
 Thiết bị lưu trữ (SAN, NAS)
 Load Balancing
 Video Conferencing
 Phụ kiện máy chủ
 Thiết Bị IoT
 Phụ Kiện Mạng


.png)


